
This tutorial briefly explains how to add Barcode ActiveX (professional version and Lite version) in a Visual FoxPro program. The screenshots were taken from Visual FoxPro 9. However, they should apply in FoxPro 6 and above.
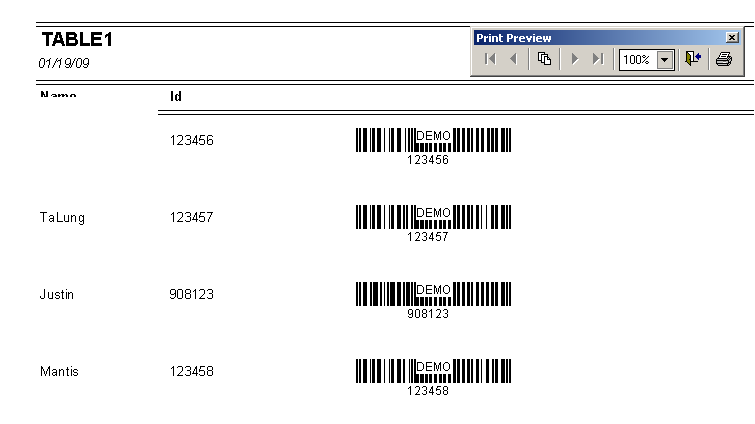
This example FoxPro application contains a small table called table1.
This table has two fields: name and ID, which
store the name and ID of employees. We would like to have barcodes for each
employee in the report.
In design mode, first make sure that Form Controls toolbar is visible with → (Alt-V+F). In the toolbar, click on . Draw a rectangle and at the completion, the program pops up a list of controls:
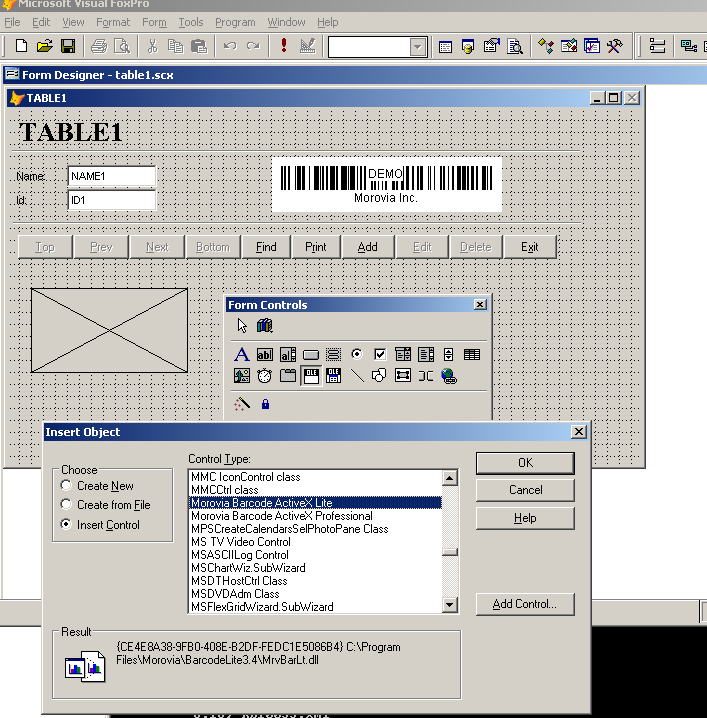
Right click on Properties and you can modify
properties there. You might want to set AutoSize to True so that the barcode drew on the screen reflect the real size, not the rectangle
you just drew.
In order to display barcodes in reports, you need to do more. The next section explains how to add barcode in a report.
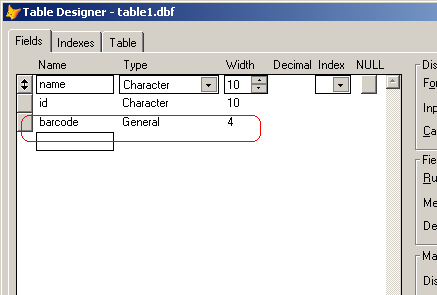
In order for the barcode to appear on a report, you need to embed it
in the table with type General. Open Table Designer,
add a field called Barcode, and set the type
to General.
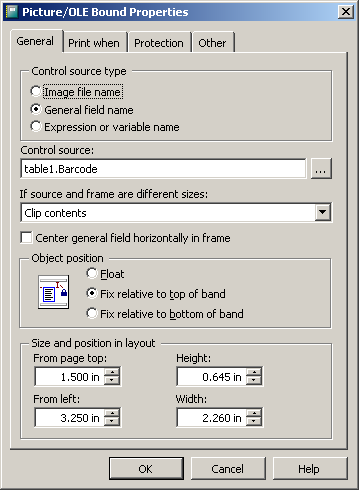
In the design mode, first make sure that Report Controls Toolbar is visible with → (Alt-V+o). In the toolbar, click on and draw a rectangle.
In the subsequent dialog, select Control source type as General field name. In the control source box,
enter table1.Barcode. This is the field name that we created in
the first step. You may need to change it if you use a different table or field
name.
Now we need to add code to initialize this control. Right click on the
report, and select Data Environment. In the Data
Environment windows, right click and select Code... to
pop up the code window. Override BeforeOpenTables procedure
in Object Dataenvironment.
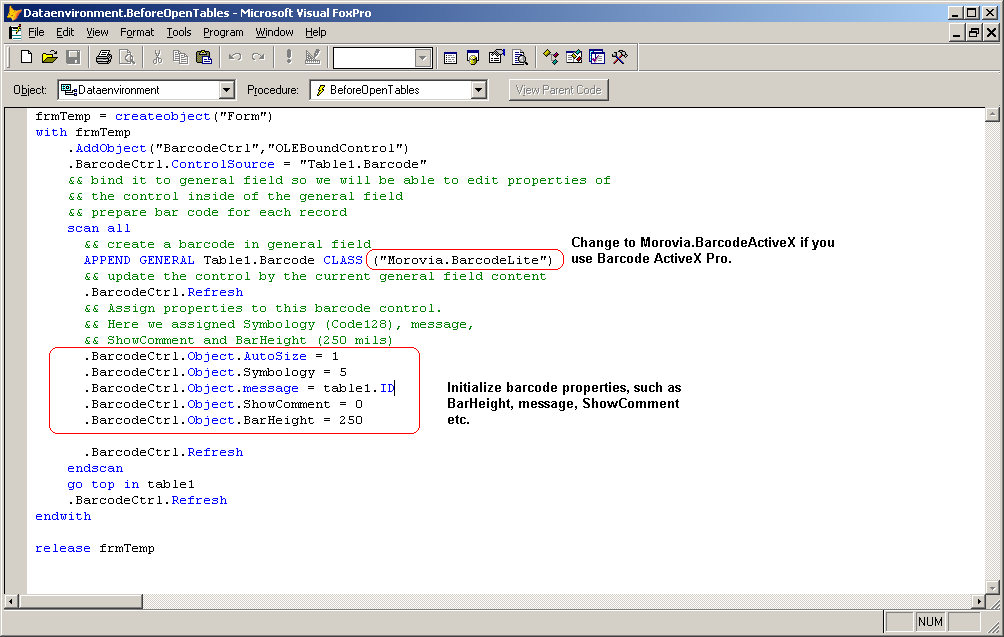
The code is listed below for copy/paste:
frmTemp = createobject("Form")
with frmTemp
  .AddObject("BarcodeCtrl","OLEBoundControl")
  .BarcodeCtrl.ControlSource = "Table1.Barcode"
  && bind it to general field so we will be able to edit properties of
  && the control inside of the general field
  && prepare bar code for each record
  scan all
    && create a barcode in general field
    APPEND GENERAL Table1.Barcode CLASS ("Morovia.BarcodeLite")
    && update the control by the current general field content
    .BarcodeCtrl.Refresh
    && Assign properties to this barcode control.
    && Here we assigned Symbology (Code128), message,
    && ShowComment and BarHeight (250 mils)
    .BarcodeCtrl.Object.AutoSize = 1
    .BarcodeCtrl.Object.Symbology = 5
    .BarcodeCtrl.Object.message = table1.ID
    .BarcodeCtrl.Object.ShowComment = 0
    .BarcodeCtrl.Object.BarHeight = 250

    .BarcodeCtrl.Refresh
  endscan
  go top in table1
  .BarcodeCtrl.Refresh
endwith

release frmTemp
If you are using Morovia Barcode ActiveX Professional, do not forget to change this line:
APPEND GENERAL Table1.Barcode CLASS ("Morovia.BarcodeLite")to
APPEND GENERAL Table1.Barcode CLASS ("Morovia.BarcodeActiveX") Now save the work. click on Print Preview button to view the report. You may notice the "demo" text on the report because we created this example with trial version software. It won' appear if the full version software is installed.
An example project can be downloaded here.
Note that this example uses
Barcode ActiveX Lite. If you have Barcode ActiveX Professional installed instead,
you need to change all references of Morovia.BarcodeLite to Morovia.BarcodeActiveX. As an alternative, you might download
a trial copy of Barcode Lite so that you can run this example project on your
computer.