Using Morovia barcode fonts and included VBA module, you can easily create barcode labels. The linear font VBA module provides encoding functions for the following barcode formats: Code 39, UPC-A, UPC-E, EAN-13, EAN-8, Code 93, Code128, EAN-128, Codabar, POSTNET, Royal Mail, and Interleaved 2 of 5. VBA modules for other types of barcodes are included in the product packages.
This tutorial assumes that you are running a retail store and need to assign UPC-A codes for items that do not have barcode on the box. Generally speaking you can assign UPC codes that started with digit 4 for your own warehouse use. You can find more information at UPC-A Specification.
To follow the steps in this tutorial, you need Morovia UPC/EAN fontware product. You can use the trial version which can be download at here.
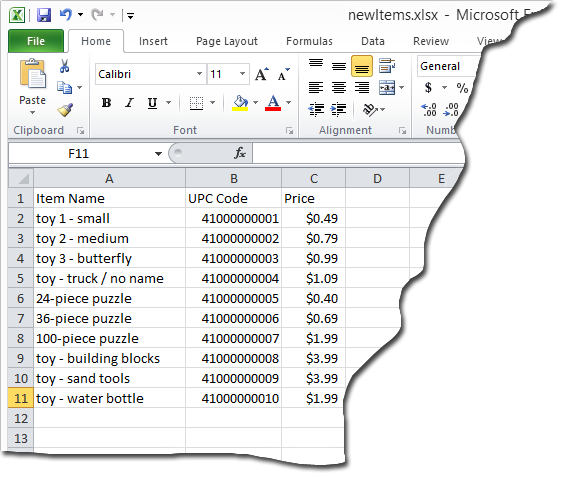
Assuming that the item list is store in an Excel spreadsheet, as below:
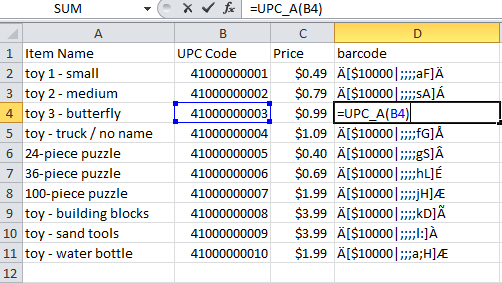
Step 1. Prepare the data source. Follow the instructions in Tutorial: Using Barcode Fonts in Excel Spreadsheets to import linear barcode font VBA module to Excel.
Step 2. In Microsoft Word, Open the tab and click on →
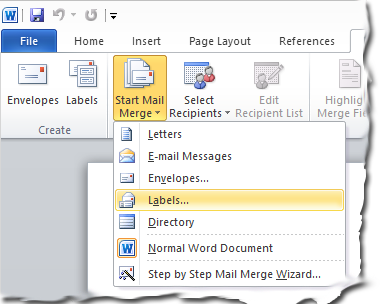
Step 3. Select the label format you'd like to use. Here we use
Avery 5163 Shipping Labels.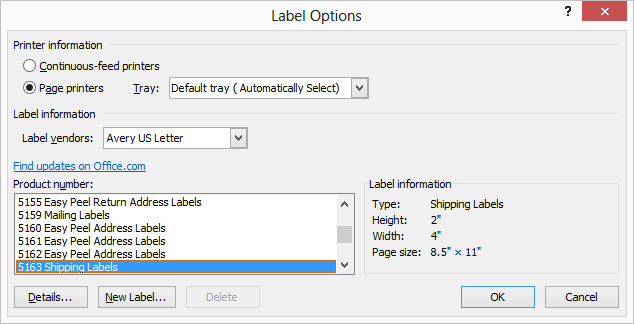
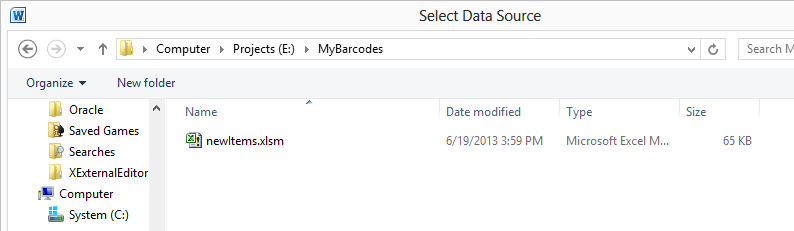
Step 4. click on → Navigate to the spreadsheet we just created.
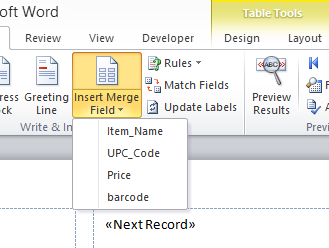
click to select
Sheet1(the default).Step 5. click on to insert the fields that appear on the label. Layout them accordingly.
Step 6. Highlight barcode field, and choose Font. Change the font to
MRV UEBMA, 12 points. Click on to transfer the settings to other labels.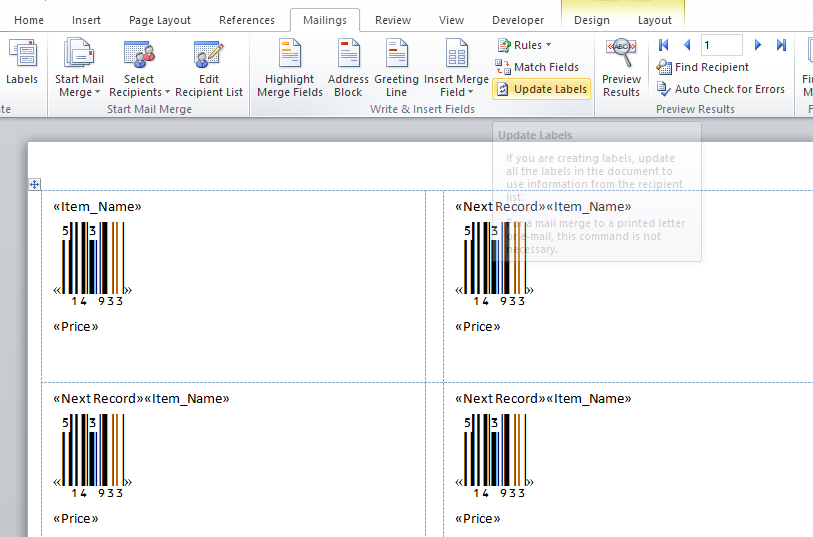
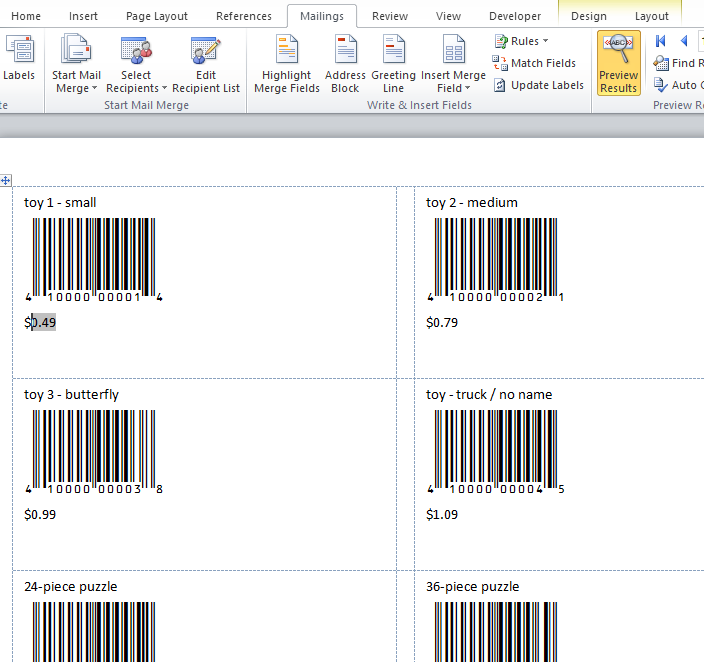
Step 7. Click on to view the merge results. You can print the labels out. If you changed values of some records, added or inserted records, the word document will reflect the changes.