Table of Contents
- 8.1. General
- 8.2. AutoLabelSize Property
- 8.3. AutoSize Property
- 8.4. BackColor, ForeColor Properties
- 8.5. BarHeight Property
- 8.6. BearerBars Property
- 8.7. BorderColor Property
- 8.8. BorderStyle Property
- 8.9. BorderWidth Property
- 8.10. Code25OptionalCheckDigit Property
- 8.11. Code39OptionalCheckDigit Property
- 8.12. Code39StartStopChars Property
- 8.13. Comment Property
- 8.14. CommentAlignment Property
- 8.15. CommentFont Property
- 8.16. CommentMarginTop, CommentMarginBottom, CommentMarginLeft, CommentMarginRight Properties
- 8.17. CommentOnTop Property
- 8.18. DataMatrixModuleSize Property
- 8.19. DataMatrixTargetSizeID Property
- 8.20. Font Property
- 8.21. I2of5OptionalCheckDigit Property
- 8.22. LabelWidth, LabelHeight Properties
- 8.23. MaxicodeClass Property
- 8.24. MaxicodeMode Property
- 8.25. MaxicodeCountryCode Property
- 8.26. MaxicodeZipCode Property
- 8.27. Measurement Property
- 8.28. Message Property
- 8.29. NarrowBarWidth Property
- 8.30. NarrowToWideRatio Property
- 8.31. PDFAspectRatio Property
- 8.32. PDFMaxCols Property
- 8.33. PDFMaxRows Property
- 8.34. PDFModuleHeight Property
- 8.35. PDFModuleWidth Property
- 8.36. PDFSecurityLevel Property
- 8.37. PDFTruncatedSymbol Property
- 8.38. Picture Property
- 8.39. QuietZones Property
- 8.40. RasterImageResolution Property
- 8.41. Rotation Property
- 8.42. ShowCheckDigit Property
- 8.43. ShowComment Property
- 8.44. ShowHRText Property
- 8.45. Symbology Property
- 8.46. SymbolMarginTop, SymbolMarginBottom, SymbolMarginLeft, SymbolMarginRight Properties
- 8.47. TexAlignment Property
- 8.48. TextOnTop Property
- 8.49. UccEanOptionalCheckDigit Property
- 8.50. ZoomRatio Property
- 8.51. About Method
- 8.52. ExportImage Method
- 8.53. Load Method
- 8.54. Save Method
Although DLL only allows plain “C” functions exported, the design uses an object-oriented
methodology. All functions manipulate the barcode object through a HANDLE which uniquely identifies the barcode object. A HANDLE is
defined as a pointer in C language.
A typical application creates the barcode object through function CreateBarcodeObject and retrieves the handle to the object. Subsequently it calls various of functions to manipulate the object properties. The function mbxExportImage is used to retrieve the barcode rendering from the object. After the application finishes, the function DestroyBarcodeObject should be called to release all resources allocated by the object.
All properties and methods are listed in this chapter. Some properties are now obsolete and kept only for backward-compatiblity reason.
Some properties may not be modifiable under certain design mode.
Some properties may be related to other properties - i.e. change
to one property will change other properties. For example,
Changing Symbology property will also alter
the value of Message property.
Table 8.1. List of Barcode Object Properties
| AutoLabelSize | Determines whether the current work mode is under barcode design mode or the label design mode. |
| AutoSize | Determines which party controls the sizing of the control. |
| BackColor | Specifies the background color for the control. |
| BarHeight | Specifies the height of the bars in the control, in user units. |
| BearerBars | Determines whether to include the bearer bars around the barcodes. applicable on selected symbologies. |
| BorderColor | Specifies the border color for the control. |
| BorderStyle | Specifies the border style. |
| BorderWidth | Specifies the border with, in logical units |
| Code25OptionalCheckDigit | Determines whether to include an optional checksum digit in all Code25 barcodes. |
| Code39OptionalCheckDigit | Determines whether to include an optional checksum digit in all code 39 barcodes. |
| Code39StartStopChars | Determines whether to display the start and stop characters in the human readable of all code 39 barcodes. |
| Comment | Specifies the string for the human readable comment printed around the barcode. |
| CommentAlignment | Determines how the text paragraphs are aligned within the comment. |
| CommentFont | Specifies the font used to draw comment text. |
| CommentMarginBottom | Specifies the margin on the bottom of the comment box. |
| CommentMarginLeft | Specifies the margin on the left of the comment box. |
| CommentMarginRight | Specifies the margin on the right of the comment box. |
| CommentMarginTop | Specifies the margin on the top of the comment box. |
| CommentOnTop | Determines whether the comment box is placed above the barcode image. |
| DataMatrixTargetSizeID | Specifies the size of the Data Matrix barcode created. |
| Font | Specifies the font used to draw human readable text. |
| ForeColor | Specifies the foreground color of the control. |
| I2of5OptionalCheckDigit | Deprecated in version 3.4. |
| LabelHeight | Specifies the height of the label (working area). |
| LabelWidth | Specifies the width of the label (working area). |
| MaxicodeClass | Specifies the service class for the structured carrier message in MaxiCode symbols. |
| MaxicodeCountryCode | Specifies the country code for the structured carrier message in MaxiCode symbols. |
| MaxicodeMode | Specifies the encoding mode for the Maxicode symbols. |
| MaxicodeZipCode | Specifies the zip/postal code for the structured carrier message in MaxiCode symbols. |
| Measurement | Specifies the measurement unit for all length properties. |
| Message | Specifies a string which represents the data to be encoded. |
| NarrowBarWidth | Specifies the width of the narrowest module in linear symbologies. |
| NarrowToWideRatio | Specifies the ratio used to calculate the width of the wide element. Applicable on selected symbologies. |
| PDFAspectRatio | Specifies the overall height to width ratio of the PDF417 barcodes created. |
| PDFMaxCols | Specifies the maximum number of codeword columns to allow in the PDF417 barcodes created. |
| PDFMaxRows | Specifies the maximum number of codeword columns to allow in the PDF417 barcodes created. |
| PDFModuleHeight | Specifies the height of the module in the PDF417 barcodes created. |
| PDFModuleWidth | Specifies the width of the module in the PDF417 barcodes created. |
| PDFSecurityLevel | Specifies the security level for error correction to use in PDF417 barcodes. |
| PDFTruncatedSymbol | Determines whether to create the truncated version of PdF417 barcodes. |
| Picture | Returns a snapshot of the drawing in Windows Enhanced Metafile Format (EMF). |
| QuietZones | Determines whether to include quiet zones in the barcodes. |
| RasterImageResolution | Specifies the resolution which is used to export raster images. |
| Rotation | Specifies the orientation of the working area in degrees. |
| ShowCheckDigit | Determines whether to include the checksum character in the human readable. |
| ShowComment | Determines whether the control displays the comment element. |
| ShowHRText | Determines whether to display the human readable text. |
| SymbolMarginBottom | Specifies the margins on the bottom of the symbol. |
| SymbolMarginLeft | Specifies the margins on the left of the symbol. |
| SymbolMarginRight | Specifies the margins on the right of the symbol. |
| SymbolMarginTop | Specifies the margins on the top of the symbol. |
| Symbology | Specifies the barcode format (symbology) |
| TexAlignment | Specifies how the human readable text is aligned. |
| TextOnTop | Determines whether the human readable text is placed above the barcode image. |
| UccEanOptionalCheckDigit | Deprecated in version 3.4 |
| ZoomRatio | Specifies the scale ratio of the current display area vs. the natural size. |
Table 8.2. List of Barcode Object Methods
| About | Displays the About dialog. |
| ExportImage | Exports the drawing to a graphics file with the specified format. |
| Load | Loads the control properties from a file in binary or XML format. |
| Save | Saves the control properties to a file in binary or XML format. |
During the evolution of this product, some properties have been deprecated in major releases. Deprecated properties are no longer used in the implement. They are kept in the interface to retain backward compatibility. Existing applications require no change to use newer versions of the product. Setting values to deprecated properties render no effects.
Generally spearking, a property is deprecated because it is redundant, difficult to get it right at the first place, and confusing to our customers.
Table 8.3. List of Deprecated Properties
| Name | Deprecated Since | Comment |
|---|---|---|
| BarWidthReduction | 3.2 | Pixel-based rendering method makes it obsolete. |
| I2of5OptionalCheckDigit | 3.4 | Interleave 2 of 5 requires input to be even. In version 3.4, a check digit is automatically calculated and appended if the input has an odd length. See Section 10.14, “Interleaved 2 of 5 (ITF25)” for more information. |
| UccEanOptionalCheckDigit | 3.4 | Since version 3.4, all GS1-128 applications that are known to the program that have mod 10 check digit will have the check digit calculated automatically and appended if necessary. See Section 10.12.3, “Auto Check Digit” for more information. |
Description
Returns or sets the value that determines the current work mode.
Syntax
HRESULT get_AutoLabelSize(HANDLE handle, bool* pVal);
HRESULT put_AutoLabelSize(HANDLE handle, bool val);
Remarks
Use this property to set/return the current work
mode. When AutoLabelSize property is TRUE, the current work
mode is barcode design mode; otherwise the label design mode is
assumed. Under the barcode design mode, the size of the
working area is not fixed. It grows or shrinks as the sizes of other
components, such as margins, barcode and the comment
change. Under barcode design mode, properties LabelWidth and LabelHeight are read-only and can not be
altered.
On the contrary, under the label design mode, the size of the working area is fixed and can not be modified. Under the label design mode, anything beyond the working area is clipped.
If you intend to create a barcode as small as
possible, choose the barcode design mode by setting this
property to TRUE. If you'd like to print a full label with
all components turned on, select the label design
mode.
Note
When you switch AutoLabelSize from TRUE to FALSE, the predefined label size - 2 by 2 inches is assumed.
See Also
Description
Returns or sets the value that defines how the control size is determined.
Syntax
HRESULT get_AutoSize(HANDLE handle, bool* pVal);
HRESULT put_AutoSize(HANDLE handle, bool val);
Remarks
AutoSize controls how the object responds to
the sizing request from the container. When AutoSize is FALSE, the object redraws itself to the maximum extent that
the container specifies; otherwise it calculates the
display size by multiplying its natural size with the ZoomRatio, and
draws itself within the display size.
When AutoSize is changed from FALSE to TRUE, the ZoomRatio is changed back to 1.0.
See Also
Description
BackColor - returns or sets the background color of the control.
ForeColor - returns or sets the foreground color of the control.
Syntax
HRESULT get_BackColor(HANDLE handle, LONG color);
HRESULT put_BackColor(HANDLE handle, LONG* pColor);
HRESULT get_ForeColor(HANDLE handle, LONG color);
HRESULT put_ForeColor(HANDLE handle, LONG* pColor);
Remarks
For opening systems we strongly recommend to set the
background color to solid white (0xFFFFFF) and
foreground color to
black (0x000000). Note: barcode requires decent contrast
between the foreground color and the background color in
order to be readable. Always test the readability thoroughly when you
select a color pair different from black and white.
Description
BarHeight - returns or sets a value for the height of bars in Barcode control.
Syntax
HRESULT get_BarHeight(HANDLE handle, LONG* pVal)
HRESULT put_BarHeight(HANDLE handle, LONG val)
Remarks
The BarHeight property specifies the height of the
dark elements in all linear symbologies with exception (see notes below).
The actual value is affected by the Measurement property. If Measurement is set to mbxMeasureEnglish, the unit for this property is mils
(1/1000 inch) otherwise it is 1/1000 cm.
The default value is 1000 which translates to 1 inch or 1 cm, depending on the measurement unit specified.
This property have no effect on the size of two-dimensional barcodes, such as PDF417, DataMatrix and MaxiCode.
The height of elements in postal symbologies (POSTNET and RoyalMail) is fixed. Therefore, changing this property has no effect on those types of barcodes.
The height of bars in a DataBar Truncated symbol is fixed at 13X (X is the industry term for NarrowBarWidth), and the height of a DataBar Stacked symbol is fixed at 50X. Therefore, this property does not affect the height of those two types of symbols.
In stacked symbologies (DataBar Stacked Omnidirectional and DataBar Expanded (multi-row), the overall height is the number of rows multiplying BarHeight, plus the height of any required separator rows.
Description
Returns or sets a value that determines whether to include bearer bars around the barcode.
Syntax
HRESULT get_BearerBars(HANDLE handle, bool* pVal);
HRESULT put_BearerBars(HANDLE handle, bool val);
Remarks
Bearer bars (see below) are horizontal bars printed across the top and bottom of the barcode image. Bearer bars can help avoid partial reads should the reader move off the top or bottom of the code. Only certain symbologies require bearer bars (for example Interleaved 2 of 5) as the start and stop characters in most bar codes make bearer bars unnecessary.
In Barcode DLL the following symbologies can have bearer bars: Codabar, Code11, Code25, Code128, UCC/EAN-128, Code39, Code39 HIBC, Code 39 Full ASCII, Code93, Interleaved 2 of 5, MSI/Plessey and Telepen. Other symbologies ignore this property.
Description
Returns or sets the color of borders.
Syntax
HRESULT put_BorderColor(HANDLE handle, LONG val);
HRESULT get_BorderColor(HANDLE handle, LONG* pVal);
Remarks
Use this property to specify the border
color of Barcode DLL. The default value
is 0 (black).
See Also
Description
BorderStyle - returns or sets a value that determines the border style.
Syntax
HRESULT put_BorderStyle(HANDLE handle, LONG Val);
HRESULT get_BorderStyle(HANDLE handle, LONG* pVal);
Remarks
Use BorderStyle property to specify the border style. This property is set by using one of the BorderStyle enumeration values:
Table 8.4. Border Styles
| Constant | Value | Description |
|---|---|---|
| mbxBorderStyleNone | 0 | No border lines |
| mbxBorderStyleSolid | 1 | Solid line |
| mbxBorderStyleDash | 2 | Dash line |
| mbxBorderStyleDot | 3 | Dot line |
| mbxBorderStyleDashDot | 4 | Dash dot line |
| mbxBorderStyleDashDotDot | 5 | Dash dot dot line |
See Also
Description
BorderWidth - returns or sets the value for the border width.
Syntax
HRESULT get_BorderWidth(HANDLE handle, LONG* pVal);
HRESULT put_BorderWidth(HANDLE handle, LONG val);
Remarks
Use BorderWidth property to specify a border
width for the Barcode DLL. The border width
is expressed in logical units prescribed by the Measurement property. For example, if you set this property to 15 and
the Measurement is mbxMeasureEnglish,
the border width is
15 mils (0.015 inch). The default value is 15.
To disable the border, set BorderWidth to 0 or BorderStyle to mbxBorderStyleNone.
See Also
Description
Code25OptionalCheckDigit - returns or sets a value that determines whether to include an optional checksum digit in all Code25 barcodes produced by Barcode DLL.
Syntax
HRESULT put_Code25OptionalCheckDigit(HANDLE handle, bool val);
HRESULT get_Code25OptionalCheckDigit(HANDLE handle, bool* pVal);
Remarks
A code 2 of 5 barcode can have an optional check digit.
When the Code25OptionalCheckDigit is TRUE,
a check digit is
calculated using modulo 10 algorithm and added to a code 2 of 5
barcode. To display the checksum digit in the human
readable text, set ShowCheckDigit to TRUE.
See Also
Description
Code39OptionalCheckDigit - returns or sets a value that determines whether to include an optional checksum digit in all Code39 barcodes produced by Barcode DLL.
Syntax
HRESULT put_Code39OptionalCheckDigit(HANDLE handle, bool val);
HRESULT get_Code39OptionalCheckDigit(HANDLE handle, bool* pVal);
Remarks
A code 3 of 9 symbol can have an optional check digit (character) at
the end of the barcode. When the Code39OptionalCheckDigit
property is set to TRUE, a check digit is calculated using
modulo 43 method and appended to the end of the barcode. To
display the checksum digit, set ShowCheckDigit to TRUE.
This property affects two symbologies: Code 39 and Code39 Full ASCII.
See Also
Description
Returns or sets a value that determines whether to display the start and stop characters in the human readable text in all Code39 barcodes produced by Barcode DLL.
Syntax
HRESULT get_Code39StartStopChars(bool* pVal);
HRESULT put_Code39StartStopChars(bool val);
Remarks
For historical reasons many code39 symbols print
start/stop characters (asterisks) at the beginning
and the end of the human readable text. While the start and
stop characters are always present in the barcode, it is
not necessary for them to appear in the human readable.
When the Code39StartStopChars property is set to TRUE, the
asterisks are displayed at both the beginning and end of
the human readable.
This property affects the three Code 39 symbologies - Code 39, HIBC and Code39 Full ASCII.
Note
The asterisks are not part of the encoded data; and you should not include asterisks in Message property when creating code 39 barcodes.
See Also
Description
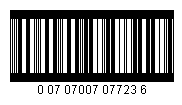
Returns or sets a string for the human readable comment printed around the barcode symbol.
Syntax
HRESULT get_Comment(HANDLE handle, char* lpszComment);
HRESULT put_Comment(HANDLE handle, const char* lpszComment);
Remarks
In addition to the human readable, which always reflects the encoded data and conforms to the standard requirements, you can optionally place a paragraph of text beside the barcode image.
You may adjust margins around the comment, place the comment at the top or bottom, modify the font typeface as well as the size, and change how the text is aligned.
Control characters are not printed.
Note
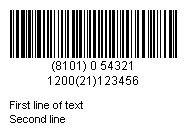
It is now possible to enter multiple paragraphs in
the comment by inserting \n at the end of each
paragraph (except the last one). For example, the string First paragraph\nSecond Paragraph renders two
paragraphs, as illustrated below:
See Also
Section 8.15, “CommentFont Property”
Section 8.14, “CommentAlignment Property”
Section 8.43, “ShowComment Property”
Description
CommentAlignment - returns or sets a value indicating how the comment is aligned.
Syntax
HRESULT get_CommentAlignment(HANDLE handle, LONG* pVal);
HRESULT put_CommentAlignment(HANDLE handle, LONG val);
Remarks
This property controls how the text in the comment portion is aligned. Valid alignment choices are listed in the table below:
Table 8.5. CommentAlignment Options
| Constant | Value | Description |
|---|---|---|
| mbxAlignLeft | 0 | Left alignment (default). Align the text to the left edge of the comment box. |
| mbxAlignRight | 1 | Right alignment. Align the text to the right edge of the comment box. |
| mbxAlignCenter | 2 | Center alignment. Align the text to the center of the comment box |
| mbxAlignJustify | 3 | Justify alignment. Align the text to both edge of the comment box. |
Description
Returns or sets the font for comment text.
Syntax
HRESULT get_Font(HANDLE handle, IFontDisp** pVal);
HRESULT put_Font(HANDLE handle, IFontDisp* val);
Remarks
The default font used to draw comment text is typeface of Arial, 8 points.
This property is used to retrieve/set the font used for comment text. To set/retrieve the font used for human readable text, use Font property.
In Visual Basic you cannot create a Font object using
code like Dim X As New Font. If you want to create a Font
object, you can use the StdFont object, as in the code below:
Dim X As New StdFont
X.Bold = True
X.Name = "Arial"
Dim rc As Long
rc = put_CommentFont(handle, X)
Description
These four properties control the margins around the comment box.
Syntax
HRESULT get_CommentMarginTop(HANDLE handle, LONG* pVal);
HRESULT put_CommentMarginTop(HANDLE handle, LONG val);
HRESULT get_CommentMarginBottom(HANDLE handle, LONG* pVal);
HRESULT put_CommentMarginBottom(HANDLE handle, LONG val);
HRESULT get_CommentMarginLeft(HANDLE handle, LONG* pVal);
HRESULT put_CommentMarginLeft(HANDLE handle, LONG val);
HRESULT get_CommentMarginRight(HANDLE handle, LONG* pVal);
HRESULT put_CommentMarginRight(HANDLE handle, LONG val);
Remarks
The above four parameters control the margins around the comment text box. Note that under different design modes, the CommentMarginLeft and CommentMarginRight have different meanings. For detailed information refer to Chapter 5, Fundamentals.
Description
Returns or sets a value that determines whether the comment box is placed above or below the symbol.
Syntax
HRESULT get_CommentOnTop(HANDLE handle, bool* pVal);
HRESULT put_CommentOnTop(HANDLE handle, bool val);
Remarks
The default value for CommentOnTop is FALSE. To place
the comment on top of the image, set this property to TRUE.
Description
Returns or sets a value that determines the width and height of a single cell in the data matrix symbols generated by Morovia Barcode DLL.
Syntax
HRESULT get_DataMatrixModuleSize(HANDLE handle, LONG* pVal);
HRESULT put_DataMatrixModuleSize(HANDLE handle, LONG val);
Remarks
The “real estate”unit of a data matrix symbol, the module, is always square. This property sets both the width and the height of the square. It affects the overall symbol size.
The default value for DataMatrixModuleSize is 20 mils. The property can be any numbers between 1 and 100.
See Also
Description
Returns or sets a value that determines the shape of the DataMatrix symbol produced by Morovia Barcode DLL.
Syntax
HRESULT get_DataMatrixTargetSizeID(HANDLE handle, LONG* pVal);
HRESULT put_DataMatrixTargetSizeID(HANDLE handle, LONG val);
Remarks
Data Matrix only allows a limit number of combinations of rows and columns. You must set the property to 0 (automatic) or one of the following values:
Table 8.6. DataMatrixTargetSizeID options
| Constant | Value | Description |
|---|---|---|
| mbxDMTargetSizeAuto | 0 | Automatic selection of data matrix size |
| mbxDMTargetSize_12X12 | 1 | Rectangle symbol of 12 by 12 modules |
| mbxDMTargetSize_14X14 | 2 | Rectangle symbol of 14 by 14 modules |
| mbxDMTargetSize_16X16 | 3 | Rectangle symbol of 16 by 16 modules |
| mbxDMTargetSize_18X18 | 4 | Rectangle symbol of 18 by 18 modules |
| mbxDMTargetSize_20X20 | 5 | Rectangle symbol of 20 by 20 modules |
| mbxDMTargetSize_22X22 | 6 | Rectangle symbol of 22 by 22 modules |
| mbxDMTargetSize_24X24 | 7 | Rectangle symbol of 24 by 24 modules |
| mbxDMTargetSize_26X26 | 8 | Rectangle symbol of 26 by 26 modules |
| mbxDMTargetSize_32X32 | 9 | Rectangle symbol of 32 by 32 modules |
| mbxDMTargetSize_36X36 | 10 | Rectangle symbol of 36 by 36 modules |
| mbxDMTargetSize_40X40 | 11 | Rectangle symbol of 40 by 40 modules |
| mbxDMTargetSize_44X44 | 12 | Rectangle symbol of 44 by 44 modules |
| mbxDMTargetSize_48X48 | 13 | Rectangle symbol of 48 by 48 modules |
| mbxDMTargetSize_52X52 | 14 | Rectangle symbol of 52 by 52 modules |
| mbxDMTargetSize_64X64 | 15 | Rectangle symbol of 64 by 64 modules |
| mbxDMTargetSize_72X72 | 16 | Rectangle symbol of 72 by 72 modules |
| mbxDMTargetSize_80X80 | 17 | Rectangle symbol of 80 by 80 modules |
| mbxDMTargetSize_88X88 | 18 | Rectangle symbol of 88 by 88 modules |
| mbxDMTargetSize_96X96 | 19 | Rectangle symbol of 96 by 96 modules |
| mbxDMTargetSize_104X104 | 20 | Rectangle symbol of 104 by 104 modules |
| mbxDMTargetSize_120X120 | 21 | Rectangle symbol of 120 by 120 modules |
| mbxDMTargetSize_132X132 | 22 | Rectangle symbol of 132 by 132 modules |
| mbxDMTargetSize_144X144 | 23 | Rectangle symbol of 144 by 144 modules |
| mbxDMTargetSize_8X18 | 24 | Rectangle symbol of 8 by 18 modules |
| mbxDMTargetSize_8X32 | 25 | Rectangle symbol of 8 by 32 modules |
| mbxDMTargetSize_12X26 | 26 | Rectangle symbol of 12 by 26 modules |
| mbxDMTargetSize_12X36 | 27 | Rectangle symbol of 12 by 36 modules |
| mbxDMTargetSize_16X36 | 28 | Rectangle symbol of 16 by 36 modules |
| mbxDMTargetSize_16X48 | 29 | Rectangle symbol of 16 by 48 modules |
| mbxDMTargetSize_10X10 | 30 | Rectangle symbol of 10 by 10 modules |
Data matrix offers limited combinations between the
number of rows and columns. A valid selection is called a data matrix size. A data matrix symbol can be
any one of the 30 shapes listed in table Table 8.6, “DataMatrixTargetSizeID options”.
In addition, our software uses value 0 for automatic size selection.
The value 0 means “do not care”. Barcode DLL selects the smallest size
to fit your data when you set DataMatrixTargetSizeID to 0.
Note
The size ID for the smallest
data matrix shape, mbxDMTargetSize_10X10, is 30.
See Also
Description
Returns or sets the font for human readable text.
Syntax
HRESULT get_Font(HANDLE handle, IFontDisp** pVal);
HRESULT put_Font(HANDLE handle, IFontDisp* val);
Remarks
The default font used to draw comment text is typeface of Arial, 9 points. Generally speaking, you should use
a sans-serif font for human readable text. Some industries require OCR-B(Optical Character Recognition Revision B)
font to be used.
This property is used to retrieve/set font for human readable text. To set /retrieve font used for comment, use CommentFont property.
In Visual Basic you cannot create a Font object using
code like Dim X As New Font. If you want to create a Font
object, you can use the StdFont object, as demonstrated in
the code below:
Dim X As New StdFont
X.Bold = True
X.Name = "Arial"
Dim rc As Long
rc = put_Font(handle, X)
See Also
Section 8.44, “ShowHRText Property”
Description
Deprected since 3.4.
Syntax
HRESULT get_I2of5OptionalCheckDigit(HANDLE handle, bool* pVal);
HRESULT put_I2of5OptionalCheckDigit(HANDLE handle, bool val);
Remarks
Previously, in order to add check digit to an Interleaved 2 of 5
bracode, you need to set this property to TRUE.
Interleaved 2 of 5 symbology requires the input to be even length. If
this property is TRUE and the input already has even length, the previous
implement appends a '0' at the end, and calculate the check digit. This
is an unexected behavior for many customers.
In version 3.4 and above, this property has no effect on the barcode created. Whether or not a check digit is required depends on if the length of the input is even or odd. If the length is even, no check digit is added and Barcode DLL encodes as is. If the length is odd, however, the program calculates the check digit and automatically appends at the end to make the whole length even.
See Also
Description
LabelWidth, LabelHeight - returns or sets the width and height of the working area, in measurement units specified by Measurement.
Syntax
HRESULT get_LabelHeight(HANDLE handle, LONG* pVal);
HRESULT put_LabelHeight(HANDLE handle, LONG val);
HRESULT get_LabelWidth(HANDLE handle, LONG* pVal);
HRESULT put_LabelWidth(HANDLE handle, LONG val);
Remarks
Under label design mode, you need to set these two properties to the size of working area you plan to work on. The drawing can only be done within the working area; anything beyond the boundary will be clipped out.
If you are working on barcode design mode by setting AutoLabelSize to TRUE, you can not set these two
properties. The working area expands and shrinks when the
barcode image and comment expand or shrink.
Same as all other length properties, the
actual value depends on Measurement property. If Measurement is mbxMeasureEnglish, the
value is measured in mils(1/1000 inch), otherwise it is in high metric (1/1000 cm).
The default working area under label design mode is 2" by 2". When you set AutolabelSize to FALSE, Barcode DLL uses the default size
for the working area by setting both LabelHeight and LabelWidth to 2000 mils.
Description
Returns or sets a value that determines the service class for structured carrier message to be encoded in Maxicode symbols generated by Morovia Barcode DLL.
Syntax
HRESULT get_MaxicodeClass(HANDLE handle, LONG* pVal);
HRESULT put_MaxicodeCountryCode(HANDLE handle, LONG val);
Remarks
The class of service code is a 3-digit number which is defined by the carrier and shipper to indentify the service class.
The default value for this property is 001 .
Description
Returns or sets a value that determines the encoding mode of Maxicode symbols generated by Morovia Barcode DLL.
Syntax
HRESULT get_MaxicodeMode(HANDLE handle, SHORT* pVal);
HRESULT put_MaxicodeMode(HANDLE handle, SHORT val);
Remarks
Maxicode specification defines 5 encoding modes from 2 to 6. Mode 2 and 3 are reserved for domestic and international carrier messages. Mode 4 and mode 5 both encode generic data. Between the two of them, mode 5 offers slightly better data security. Other Maxicode properties, such as MaxicodeClass, MaxicodeCountryCode, are meaningful only under mode 2 and 3. Mode 6 is designated for reader programming purposes.
Description
Returns or sets a value that identifies the country in the structure carrier message encoded in Mode 2 or Mode 3 MaxiCode symbols.
Syntax
HRESULT get_MaxicodeCountryCode(HANDLE handle, LONG* lCountryCode);
HRESULT put_MaxicodeCountryCode(HANDLE handle, LONG countrycode);
Remarks
The country code is a 3-digit number which represents a country. For a complete list of country codes, see ISO standard 3166.
Description
Returns or sets a value for the postal code/zip code used in the structure carrier message under Mode 2 or Mode 3 MaxiCode symbols.
Syntax
HRESULT get_MaxicodeZipCode(HANDLE handle, char* lppszValue);
HRESULT put_MaxicodeZipCode(HANDLE handle, const char* lpszValue);
Remarks
The MaxiCodeZipCode is the postal code/zip code of the delivery address. Only capital letters and digits are acceptable.
Note: Mode 2 encodes a 9-digit U.S. zip code while Mode 3
encodes a 6-character alpha-numeric postal code. You are not
allowed to specify a text with length greater than 9. If MaxiCodeMode is 2 but an
alpha-numeric MaxicodeZipCode is specified, the
program uses 000000000 as the MaxiCodeZipCode.
Description
Returns or sets the measurement unit for all length properties.
Syntax
HRESULT get_Measurement(HANDLE handle, LONG* pVal);
HRESULT put_Measurement(HANDLE handle, LONG val);
Remarks
You can set this property to one of the two values:
Table 8.7. Measurement Unit Options
| Constant | Value | Description |
|---|---|---|
| mbxMeasureEnglish | 0 | All lengths are in mils (1/1000 inch) |
| mbxMeasureMetrics | 1 | All lengths are in 1/1000 cm |
Most symbologies use U.S. English measurement unit, which is based on mils (1/1000 inch). Some symbologies are metric oriented, such as Royal Mail and MaxiCode. To produce barcodes as accurate as possible, we recommend that you stick to the measurement unit specified by the standard to avoid float number calculation.
Note
When Measurement changes, all length properties change accordingly so that the barcode sizes remain intact.
Description
Returns or sets a string for the message to be encoded.
Syntax
HRESULT get_Message(HANDLE handle, char* lppszValue);
HRESULT put_Message(HANDLE handle, const char* lpszValue);
Remarks
Not all symbologies are capable of encoding all characters. Some may only encode numeric data. Some impose a limit on the length of the encoded data. If you encode data with invalid characters or length, Barcode DLL returns an error.
UPC symbologies (UPC-A, UPC-E, EAN-13, EAN-8)
A UPC symbol may have an optional 2-digit or 5-digit add-on barcode. To create an add-on barcode, separate the main data and the extension data with a vertical bar. For example, the input
1-932111-39-5|55999produces a Bookland barcode with a 5-digit add-on symbol.GS1 DataBar Symbologies (DataBar, Truncated, Limit, Stacked and Stacked Omnidirectional)
All GS1 DataBar symbologies excluding DataBar Expanded encode A 14-digit number called GTIN (Global Trade Identification Number). The input must be exactly 13 or 14 digits. AI (01) is part of human readable but should not go into the input.
GS1-128 Symbology
To ensure the human readable format is correct, the AI and field ID must be enclosed with parentheses ( () ). If the data is formatted incorrectly you may end with an error. For example, the following data is valid for UCC/EAN 128 message input:
(01)12345678901231
Additional information is also needed to create a shortest possible barcode. Refer to Section 10.12, “UCC/EAN-128” for more details.
GS1 DataBar Expanded
The data encoded by DataBar Expanded follow the exact rules that outlined in the above bullet (See GS1-128 Symbology). AI must be enclosed with parentheses ( () ).
Tilde codes
Tilde code sequence can be used to enter special characters, such as extended ASCII characters and symbology-specific characters if supported. See each Symbology section for details.
Description
Returns or sets a value for the width of the narrowest module in linear symbologies.
Syntax
HRESULT get_NarrowBarWidth(HANDLE handle, LONG* pVal);
HRESULT put_NarrowBarWidth(HANDLE handle, LONG val);
Remarks
This property defines the width of the narrowest element in a linear barcode - a.k.a X-dimension. The measurement unit is in either 1/1000 inch or 1/1000 cm depending on the Measurement unit used.
By default the value for this property is 13. The
valid range is from 1 to 1000.
Industry standards require that the barcodes used in an open system have a
X-dimension at least of 10 mils (one-hundredth of inch). If the
X-dimension is too small, some scanners may have problems
reading the barcode.
This property affects most linear symbologies. Height-modulated postal barcodes, such as POSTNET and Royal Mail barcodes, use fixed pitch thus this property has no effect on these symbologies.
Description
Returns or sets the ratio of the wide to narrow bar in a barcode.
Syntax
HRESULT get_NarrowToWideRatio(HANDLE handle, double* pVal);
HRESULT put_NarrowToWideRatio(HANDLE handle, double val);
Remarks
Some linear symbologies can have two module widths.
The width of the wide one is a fixed multiple of the width
of the narrow module (NarrowBarWidth).
You can choose a
value ranging from 2.0 to 3.0 for this ratio.
This property is valid only for Code 39, Code 25,
Code 11, Codabar and Interleaved 2 of 5 symbologies. All
others ignore this property. We also recommend you set a
value between 2.5 to 3.0 so the barcode can be easier to be
recognized.
Since the value may impact the readability of the
barcode, we highly recommend that you test the barcode
readability when you set the value to anything below 2.5.
Description
Returns or sets a value for the overall height to width ratio of PDF417 barcode generated by Barcode DLL.
Syntax
HRESULT get_PDFAspectRatio(double* pVal);
HRESULT put_PDFAspectRatio(double val);
Remarks
The PDFAspectRatio determines the overall shape of the PDF417 symbol and is defined as the overall height to width ratio. Higher values for the Aspect Ratio (greater than 1) produce tall, thin PDF417 bar codes and small values (greater than zero and less than 1) produce short, wide bar codes. A value of 1 produces approximately square bar codes.
The default value for this property is 0.5.
Description
Returns or sets a value for the maximum number of codeword columns allowable in all PDF417 barcodes generated. Since version 3.4, this property is also used to specify the number of symbol per row in GS1 DataBar Expanded symbology.
Syntax
HRESULT get_PDFMaxCols(LONG* pVal);
HRESULT put_PDFMaxCols(LONG val);
Remarks
The PDFMaxCols and the PDFMaxRows properties allow you to set the target number of columns and rows.
The PDFMaxCols property specifies the maximum number of codeword columns in a PDF symbol. It can be set to a value ranging from 1 to 30.
Since version 3.4, GS1 DataBar Expanded is supported in Barcode ActiveX Professional and Barcode DLL product line. DataBar Expanded can be mutliple rows, with each row holding even number of symbol characters. This property is used to specify the number of symbols per row in DataBar symbology. This number must be between 2 and 22 otherwise 22 is used. Because DataBar Expanded can have 22 symbols at the most. Setting to 22 or 0 makes the resulted barcode one row only. When used in DataBar Expanded symbology, the number must be even otherwise it is rounded to the closet even integer.
See Also
Description
Returns or sets a value for the maximum number of codeword rows allowable in all PDF417 bar code symbols produced by Morovia Barcode DLL.
Syntax
HRESULT get_PDFMaxRows(HANDLE handle, LONG* pVal);
HRESULT put_PDFMaxRows(HANDLE handle, LONG val);
Remarks
The PDFMaxCols and the PDFMaxRows properties allow you to set the target number of columns and rows. The default value for PDFMaxRows is 0, meaning that program automatically picks the number of rows. The valid range for this property is 3 to 90.
See Also
Description
Returns or sets a value for the height of the modules in the PDF417 barcode generated.
Syntax
HRESULT get_PDFModuleHeight(LONG* pVal);
HRESULT put_PDFModuleHeight(LONG val);
Remarks
The recommended value for PDFModuleHeight is
approximately three times the value of PDFModuleWidth.
You can set this property to any values greater
than 10 mils.
The valid range for PDFModuleHeight is from 1 to 100. The default value is 30.
See Also
Description
Returns or sets a value for the width of the modules in the PDF417 barcodes generated.
Syntax
HRESULT get_PDFModuleWidth(LONG* pVal);
HRESULT put_PDFModuleWidth(LONG val);
Remarks
The recommended value for PDFModuleWidth is between 10 and 30 mils. To achieve the best read rate, we recommend that you set a value which is integral times of the pixel width on the target device (the width of a pixel on a computer display is 10.42 mils and the one on a laser printer is 3.33 mils).
The valid range for this property is between 1 and 100. The default value is 13.
See Also
Description
Returns or sets a value for security level used in all PDF417 barcodes generated.
Syntax
HRESULT get_PDFSecurityLevel(SHORT* pVal);
HRESULT put_PDFSecurityLevel(SHORT val);
Remarks
The PDFSecurityLevel property allows you to select a PDF417 error correction level from 0 to 8 (or 9 for automatic). Each higher security level up to 8 adds additional overhead to a PDF417 symbol thereby requires large symbol space.
The default value for this property is 9 (automatic).
Description
Returns or sets a value that determines whether to generate the truncated version of all PDF417 bar codes generated by the Barcode DLL.
Syntax
HRESULT get_PDFTruncatedSymbol(bool* pVal);
HRESULT put_PDFTruncatedSymbol(bool val);
Remarks
You can produce a truncated version of PDF417 barcode
by setting PDFTruncatedSymbol to TRUE.
A truncated PDF417 symbol
reduces the stop pattern to a single termination
bar. Truncated symbols should be used only in a clean and
controled environment.
The default value for this property is FALSE.
Description
Readonly property. Returns a snapshot of the drawing in Windows Enhanced Metafile Format (EMF).
Syntax
HRESULT get_Picture(IPictureDisp** ppVal);
Remarks
The Picture property provides a convenient method to retrieve the drawing without first saving it to disk. The picture object contains an enhanced metafile handle which can be passed to clipboard or played on a device.
Note after version 3.2, drawing units are measured
from the default printer. If you print to a low-resolution
printer, set the target printer as the default before
retrieving the EMF handle.
Description
Returns or sets a value that determines whether to include quiet zones on the barcodes generated.
Syntax
HRESULT get_QuietZones(bool* pVal);
HRESULT put_QuietZones(bool val);
Remarks
In linear barcodes, quiet zone is defined as a clear space that precedes the start character of a barcode symbol and follows the stop character. In two-dimensional barcodes quiet zones are clear area around the barcode. The space is required to help scanner determine where the barcode starts and stops.
The width of space added is 10 times the NarrowBarWidth value for all linear barcodes, 2 times PDFModuleWidth value for PDF417 barcodes, 2 times DataMatrixModuleSize value for DataMatrix barcodes and 1 element width for MaxiCode barcodes. Setting this property substantially increase the barcode length for linear symbologies.
You can also use symbol margins to create effective quiet zones.
By default Barcode DLL set the symbol margins to 100 mils at 4 directions.
When this is the case, you may safely
set this property to FALSE to better
align the comment and human readable text.
Description
RasterImageResolution - returns or sets a value that corresponds to the resolution (in pixels per inch) of the target device when export barcode images to a raster graphic file format (JPEG, GIF, PNG, TIF and BMP).
Syntax
HRESULT get_RasterImageResolution(LONG* pVal);
HRESULT put_RasterImageResolution(LONG val);
Remarks
When you export the barcode image into a raster graphics file format such as JPG, GIF and PNG, you are converting the drawing commands (device independent) to an array of pixels which are device dependent. The size of a pixel varies based on the device and usually is measured by dot per inch (dpi). A laser printer usually has a high resolution of 300 dpi while the screen has a low resolution of 96 dpi. As a result, an image may have different physical size when displayed on the screen than printed. The greater the resolution is, the bigger the file size and the accurate of the details. We suggest you set this property to the value which matches your printer.
The default value for this property is 300.
See Also
Description
Returns or sets a value indicating how to rotate the working area.
Syntax
HRESULT get_Rotation(LONG* pVal);
HRESULT put_Rotation(LONG val);
Remarks
This property controls how the working area is rotated. Valid rotation choices are:
Table 8.8. Rotation Options
| Constant | Value | Description |
|---|---|---|
| mbxRTZeroDegree | 0 | No rotation |
| mbxRTAntiClockwise_90 | 1 | Rotate at 90 degrees angle counterclockwise |
| mbxRTAntiClockwise_180 | 2 | Rotate at 180 degrees angle counterclockwise(upside down) |
| mbxRTAntiClockwise_270 | 3 | Rotate at 270 degrees angle counterclockwise |
Description
ShowCheckDigit - Determines whether the checksum characters will be shown on the human readable portion. This option is effective to selected symbologies only.
Syntax
HRESULT get_ShowCheckDigit(bool* pval);
HRESULT put_ShowCheckDigit(bool val);
Remarks
Different symbologies have different rules regarding check digit. For some symbologies, check digit is part of the data and should always be included in the human readable text. Some symbologies allow optional check digit. Some symbologies require check character not be displayed at all.
Check digit is part of data and is always displayed.
This category includes UPC-A, UPC-E, EAN-13, EAN-8, Bookland, and UCC/EAN-128. This property has no effect on these symbologies.
Check digit is required, but not treated as part of data and is never included in the human readable text.
This category includes Code 128, Telepen and Telepen Numeric.
Check digit is required, and can be optinally included into the human readable text.
This category includes Code 93, Code 11, POSTNET, PLANET and MSI/Plessey.
Check digit is optional, and can be optionally included in the human readable text.
This category includes Code 39, Code 39 Full ASCII, HIBC.
In version 3.4, there are some noteable changes:
Previously, HIBC barcodes may turn off its check digit in the human readable display (although the check digit always appear in the barcode). After 3.4, the check digit is always included in the human readable text, as required by the standard.
Before 3.4, whether a UCC/EAN-128 check digit is calculated depends on UccEanOptionalCheckDigit. After version 3.4, the check digit is always included in the human readable text.
See Also
Section 8.44, “ShowHRText Property”
Section 8.10, “ Code25OptionalCheckDigit Property ”
Description
Returns or sets a value that determines whether the control displays the comment portion.
Syntax
HRESULT get_ShowComment(bool* pVal);
HRESULT put_ShowComment(bool val);
Remarks
Toggle this property to turn on or turn off the
display of the comment portion. Note that if this property is FALSE, comment margin properties will not
be included during the position calculation of other
components, such as working area, bar code image etc. If
you want to have these margins participate the calculation
and do not want to see the comment, set Comment property to an empty string instead.
Description
Returns or sets a value that determines whether the control displays the human readable portion.
Syntax
HRESULT get_ShowHRText(bool* pVal);
HRESULT put_ShowHRText(bool val);
Remarks
Toggle this property to turn on or turn off the display of the human readable text.
Two dimensional barcodes do not have the concept of “human readable”. Consequently this property has no effect on 2D barcodes.
Per standard, UPC-A, UPC-E, EAN-13, EAN-8 barcodes and their
supplements should always have the human readable as an integrated
part of the image. In versions prior to 3.2, you can not produce
those barcodes without visible human readable, even you set ShowHRText to FALSE.
This behavior has changed since version 3.2. Unless you have
absolute reason to turn it off, you should set ShowHRText to TRUE when creating these types of barcodes.
Note
The width of human readable text portion never exceeds the barcode length. If the barcode length is too small, the text will wrap into multiple lines. If this is not desired, reduce the font size, or place the human readable text into comment and adjust comment margin properties to increase the width of comment box so that the text stays in one line.
Description
Returns or sets a value indicating the type of the bar code format (symbology) to be generated by the ActiveX control.
Syntax
HRESULT get_Symbology(LONG* pVal);
HRESULT put_Symbology(LONG val);
Remarks
The Barcode DLL currently supports the following symbologies:
Table 8.9. Symbology Options
| Constant | Value | Description |
|---|---|---|
| mbxCode39 | 0 | (default) Code 39 (43 character set) |
| mbxCode39_Full_ASCII | 1 | Code 39 Full ASCII |
| mbxCode39_HIBC | 2 | Code 39 Mod 43 (Health Industry Bar Code) |
| mbxCodaBar | 3 | Codabar |
| mbxCode93 | 4 | Code 93 |
| mbxCode128 | 5 | Code 128 |
| mbxUCC_EAN_128 | 6 | UCC/EAN 128 |
| mbxInterleaved_2of5 | 7 | Interleaved 2 of 5 (ITF25) |
| mbxUPC_A | 8 | UPC-A |
| mbxUPC_E | 9 | UPC-E |
| mbxEAN_13 | 10 | EAN/JAN-13 |
| mbxEAN_8 | 11 | EAN/JAN-8 |
| mbxBookland | 12 | Bookland |
| mbxTelepen | 13 | Telepen |
| mbxTelepenNumeric | 14 | Telepen Numeric (double density) |
| mbxPostnet | 20 | PostNET (barcode used by USPS) |
| mbxPlanet | 21 | Planet (used by USPS for package tracking) |
| mbxRoyalMail | 22 | Royal Mail (U.K. Postal) |
| mbxMSI_Plessey | 30 | MSI/Plessey |
| mbxCode25 | 31 | Code 25 |
| mbxCode11 | 32 | Code 11 |
| mbxCode11 | 32 | Code 11 |
| mbxDataBar | 33 | DataBar |
| mbxDataBarTruncated | 34 | DataBar Truncated |
| mbxDataBarStacked | 35 | DataBar Stacked |
| mbxDataBarStackedOmni | 36 | DataBar Stacked Omnidirectional |
| mbxDataBarLimited | 37 | DataBar Limited |
| mbxDataBarExpanded | 38 | DataBar Expanded |
| mbxPDF417 | 40 | PDF 417 (2D symbology) |
| mbxDataMatrix | 41 | DataMatrix (2D symbology) |
| mbxMaxiCode | 42 | MaxiCode (2D symbology) |
Some symbologies only encode certain limited set of characters, such as digits. Some symbologies impose limit of the data length; some require checksum characters. If you are not familiar with the symbologies you are working on, refer to Chapter 10, Barcode Technologies to get some hands-on information.
Description
These four properties control the margins around the symbol boundary (including barcode, human readable and comment).
Syntax
HRESULT get_SymbolMarginTop(LONG* pVal);
HRESULT put_SymbolMarginTop(LONG val);
HRESULT get_SymbolMarginBottom(LONG* pVal);
HRESULT put_SymbolMarginBottom(LONG val);
HRESULT get_SymbolMarginLeft(LONG* pVal);
HRESULT put_SymbolMarginLeft(LONG val);
HRESULT get_SymbolMarginRight(LONG* pVal);
HRESULT put_SymbolMarginRight(LONG val);
Remarks
These four parameters control the margins around the symbol (barcode, human readable and comment).
Description
Returns or sets a value indicating how the human readable text is aligned.
Syntax
HRESULT get_TexAlignment(LONG* pVal);
HRESULT put_TexAlignment(LONG val);
Remarks
This property controls how the text in the human readable portion is aligned. Valid alignment choices are:
Table 8.10. TexAlignment Options
| Constant | Value | Description |
|---|---|---|
| mbxAlignLeft | 0 | Left alignment (default). Align the text with left edge of the comment box. |
| mbxAlignRight | 1 | Right alignment. Align the text with the right edge of the comment box. |
| mbxAlignCenter | 2 | Center alignment. Align the text with the center of the comment box |
| mbxAlignJustify | 3 | Justify alignment. Align the text to both edge of the comment box. |
Because of the unique character arrangement in UPC/EAN symbologies, this property does not apply on those symbologies: UPC-A, UPC-E, EAN-13 and EAN-8.
The barcodes below illustrate the effects of TexAlignment:
Note
When our first Barcode component product was released, the property was misspelled as TexAlignment instead of the correct spelling TextAlignment. For compatibility reasons we keep using the misspelled word as the property name. Check the spelling when you find that your application did not achieve the desired result.
See Also
Description
Returns or sets a value that determines whether the human readable text is placed above the barcode image or below the image.
Syntax
HRESULT get_TextOnTop(bool* pVal);
HRESULT put_TextOnTop(bool val);
Remarks
The default value for TextOnTop is FALSE which places the human readable text below the barcode. To place the
human readable text above the barcode, set TextOnTop to TRUE.
Two-dimensional symbologies (PDF417, Data Matrix and MaxiCode) do not support human readable text. This property has no effects when the current symbology is PDF417, Data Matrix or MaxiCode.
See Also
Description
Deprecated since version 3.4.
Syntax
HRESULT get_UccEanOptionalCheckDigit(bool* pVal);
HRESULT put_UccEanOptionalCheckDigit(bool val);
Remarks
Before version 3.4, this
This property kicks in only when all the following conditions are met: (1) the current symbology is set to UCC_EAN_128. (2) the data element contains an AI of 00 (SSCC-18) or 01(SCC-14). (3) the data length is 1ess than the required. The check digit is calculated based on Mod 10 algorithm and appended to the end of the data part. The check digit also appears in the human readable text.
For example, when the property UCC_EAN_128 is set to TRUE, the data (01)3001234567890 becomes (01)30012345678906 where the last digit of 6
is the calculated mod10 check digit.
Description
Returns or sets the value that determines the actual display size of the control.
Syntax
HRESULT get_ZoomRatio(double* pVal);
HRESULT put_ZoomRatio(double val);
Remarks
When the AutoSize is FALSE, the
container controls the size of the display area. The
Barcode DLL displays itself to the full extent in the
display area prescribed by the container while keeping the
aspect ratio. The user can not set ZoomRatio under this
mode; instead the user changes the property by dragging the
tracking box using the mouse pointer.When the AutoSize
property is set to TRUE, the Barcode DLL decides the
size of the display area. You can change the size of the
display area by modifying the natural size, or the ZoomRatio. To make sure that barcode created has a high
quality, do not set ZoomRatio to any values other than 1 at
the print time. To modify the barcode size it is highly
recommended to do so through length properties, such as NarrowBarWidth, BarHeight,
and PDF417ModuleHeight etc.
Description
Display the About Dialog.
Syntax
void mbxAbout(HANDLE handle);
Remarks
The About dialog displays the version information. It also displays the license information used to create the barcode object.
 |
Description
Exports the image to a graphics file with the specified format. This allows other programs to use the barcode images generated.
Syntax
HRESULT mbxExportImage(HANDLE handle,
    const char* lpszFileName, LONG imageFormat)
HRESULT mbxExportImage2(HANDLE handle,
    IDispatch* pStream, LONG imageFormat)
Remarks
Exports the image into the file specified by the filename in a standard format. Barcode DLL supports the export to the following graphic formats:
| Constant | Value | Description |
|---|---|---|
| mbxFormatBMP | 0 | Windows bitmap |
| mbxFormatJPG | 1 | JPEG |
| mbxFormatGIF | 2 | GIF |
| mbxFormatTIF | 3 | TIFF |
| mbxFormatPNG | 5 | PNG |
| mbxFormatEMF | 6 | EMF (Windows Enhanced MetaFile) |
| mbxFormatWMF | 7 | WMF (Windows MetaFile) |
Use ExportImage to save the barcode image to a disk file or a Streamobject, with the specified graphic format. If the file already exists, the method overwrites the file.
When Barcode DLL exports to EMF format, the resolution of the default printer is used as the basis to create the barcode. If you use the EMF handle to print to a low resolution printer, set this printer as default before calling ExportImage.
When Barcode DLL exports to WMF format, a high resolution of 1440 dpi is assumed. A high resolution printer is needed to replay the WMF handle.
All other file formats are raster image format. The property RasterImageResoluton determines the resolution to use during the rasterization. PNG or GIF are preferred formats because they are lossless and compressed well for barcode images.
Note
The WMF file format does not contain frame size
information. To find out the exact size, retrieve LabelHeight and LabelWidth from the object. The bitmap
rendering process utilizes printer drivers. To avoid
rounding errors between the drawing units (target
resolution) and the device units (for text measurement),
we recommend that you have the printer driver installed
on the computer that creates the barcode image. For
example, if you create bitmap images targeting a
thermal printer (203 dpi),
you should install such a
printer driver on the computer you are working. During
the ExportImage process, the printer driver is consulted
to make sure that the bitmap created reflects the actual
print out. You do not need to connect the printer to the
computer. The barcode quality is ensured when RasterImageResolution is set to a value
compatible with screen or an installed printer device.
Note
The behavior of this method changed in version 3.6.
In versions before 3.6, the Save method overwrite the file if it exists. After 3.6, an existing file is overwritten only when all conditions below are true:
None of the following attribute bits is set:
read-only,hiddenandsystem.The extension of the file must be one of the following:
bmp,jpg,jpeg,gif,tif,tiff,png,emforwmf.
If any of the conditions is not met, the method returns an error.
However, if the path specified does not exist, a new file will be created, and the rules on the attributes and extensions do not apply.
See Also
Description
Load the Barcoce ActiveX object from a file, in binary or XML format.
Syntax
HRESULT mbxLoad(HANDLE handle,
    const char* lpszFileName, LONG persistFormat);
lpszFileName
A string that represents the complete path name of the file where the object is to be saved.
PersistFormat
A PersistFormatEnum value that specifies the format in which the object is to be saved (XML or Bianry). The default value is mbxPersistBinary.
Remarks
The Load method loads the property data and draws the
barcode image based on the data loaded. The PersistFormat can be one of these values:
Table 8.11. PersistFormat Options (Load method)
| Constant | Value | Description |
|---|---|---|
| mbxPersistBinary | 0 | Binary Format |
| mbxPersistXML | 1 | XML Format |
Description
Saves the Barcoce ActiveX object in a file, in binary or XML format.
Syntax
HRESULT mbxSave(HANDLE handle,
        const char* lpszFileName, LONG persistFormat);
lpszFilename
A string that represents the complete path name of the file where the object is to be saved.
PersistFormat
A PersistFormatEnum value that specifies the format in which the object is to be saved (XML or Bianry). The default value is
mbxPersistBinary.
Remarks
The Save method saves the property data into a disk file or a Streamobject in binary or XML format. The PersistFormat can be one of these values:
Table 8.12. PersistFormat Options (Save method)
| Constant | Value | Description |
|---|---|---|
| mbxPersistBinary | 0 | Binary Format |
| mbxPersistXML | 1 | XML Format |
If the file already exist, the method overwrites the file.
Note
The behavior of this method changed in version 3.6.
In versions before 3.6, the Save method overwrites the file if it exists. After 3.6, an existing file is overwritten only when all conditions below are true:
None of the following attribute bits is set:
read-only,hiddenandsystem.The extension of the file must be one of the following:
bax,bax3,mbxorxml.
If any of the conditions is not met, the method returns an error.
However, if the path specified does not exist, a new file will be created, and the rules on the attributes and extensions do not apply.