Table of Contents
Monterey Barcode Creator requires the following systems:
Microsoft Windows® 7, Windows Server 2008 or above.
Pentium processor or above.
512 megabytes of RAM.
100 megabytes of free hard drive space for installation.
A thermal/Ink Jet/Laser printer with resolution at least 200 dpi. A laser printer with 600-dpi or above is highly recommended.
A barcode scanner to verify the barcode created.
Insert the program CD into your CD drive. The setup starts automatically. Or if the auto-run feature isn't enabled on your system, click the Windows button and choose the Run command. Type
D:\Setup.exein the dialog box and click the button (Note thatDrepresents the letter assigned to your CD-ROM drive. If your drive is assigned to a different letter, use it instead ofD).Follow the on-screen instructions.
Your will be prompted to enter the
License To/Registration Code. TheLicense to/ andRegistration Codeinformation are found on the back of the CD case.
Click the Download link to start the download.
When the browser prompts, do one of the following: A. To run setup immediately, click Open or Run This Program from Its Current Location. B. If you decide to run the setup at a later time, click
SaveorSave This Program to Disk.If you choosed
Save This Program to Diskin Step 2, locate the file where you saved it, and double click the .exe file to run setup.Follow the setup instructions.
Your will be prompted to enter the
License To/Registration Code. TheLicense To/ andRegistration Codeinformation can be found in the email we send to you after order completes.
To run Barcode Creator, follow the basic operations:
Choose Programs from the Start menu.
Choose the Morovia folder.
Choose Barcode Creator folder.
Choose the Barcode Creator 3.
The program can also be launched by double clicking the shortcut installed on the desktop.
Many program features of Monterey Barcode Creator, including the software menus, resemble to Microsoft Office applications. They are easy to use.
A menu displays a list of commands. To select a command from the menus, you can do the following:
Click the left mouse button once directly on the menu name (i.e., File, Edit, View, etc.).
When the menu drops down, click once on the desired command.
The toolbar buttons give you quick access to many frequently used commands and features in the Monterey Barcode Creator.
To find out the name of a tool, hold the mouse pointer motionless over the tool button for about a second and a ScreenTip will appear showing the name of the tool.
The status bar at the bottom of the Barcode Creator application window also provides a brief description of the tool, over which the mouse is positioned on.
To select a command using the toolbar, you may do the following:
Position the mouse over the desired tool button.
Click the left mouse button once.
You can rearrange or modify the toolbars, so that it is personalized for the way you work.
To show or hide a toolbar, on the drop-down View menu, point to toolbars, and then check the toolbars that you want to show or hide. Alternatively you may right click on the spare space of the toolbuttons, then on the pop-up menu check or uncheck the toolbars you want to show or hide.
The toolbars can also be moved anywhere on the screen by docking and floating.
To float and dock the toolbar, follow the steps below:
Double-click on the toolbar. Note that you must double-click on an area of the toolbar between or below the toolbar buttons. The tools will now appear in a floating window.
Click and drag the toolbar to the desired location. If you want the toolbar docked on the screen's edge, drag the toolbar until the cursor appears over the edge. The cursor will change shape to indicate that the toolbar can be docked.
To return a floating toolbar to its docked location, simply double click the title bar on the floating toolbar's window.
After you choose a command, a dialog often appears. A dialog is used to select options pertaining to the command or feature. If an option in a dialog is dimmed, this means the option is not available. Some dialogs provide various sets of options. These sets of options are divided into tabbed pages. Click on the tab to display the options.
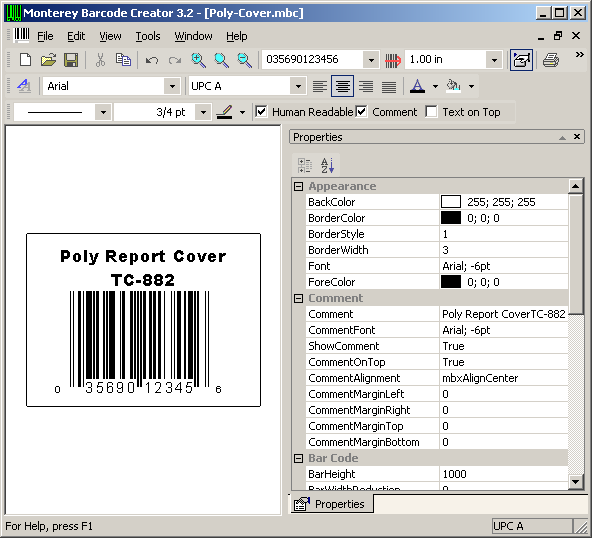
Monterey Barcode Creator 3 introduces a new window, which allows you to fine tune the barcode you created.
Use this window to view and change the design-time properties of the barcode object located in the designer window. Properties window is available from the View menu.
The Properties window displays different types of editing fields, depending on the needs of a particular property. These edit fields include edit boxes, drop-down lists, and links to custom editor dialog boxes. Properties shown in gray are read-only.
| Element | Graphic | Description |
|---|---|---|
Categorized |  | Lists all properties and property values for the selected object, by category. You can collapse a category to reduce the number of visible properties. When you expand or collapse a category, you see a plus (+) or minus (-) to the left of the category name. |
Alphabetic |  | Alphabetically sorts all properties and events for selected objects. To edit an undimmed property, click in the cell to its right and enter changes. |
Properties |  | Toggle on/off the display of the Properties window |
Like toolbars, the Properties window can also be docked or floated.
Welcome to Monterey Barcode Creator, the powerful barcode image creation program. This quick tour is designed to introduce you to the power and flexibility of the Monterey Barcode Creator. Monterey Barcode Creator performs several key functions: creating, opening and printing barcodes. This short tour will show you each of these functions.
After completing this tour, you should be able to perform all the tasks necessary to manage your barcodes. The remainder of the manual is a reference for additional information about specific features.
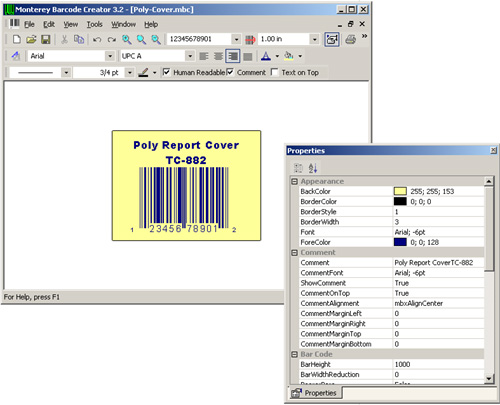
In this tour we are going to make barcodes for our fictional
product - Poly Report Cover. We'd like to print the labels on a
2 X 7 Avery® label paper.
Each label contains a UPC-A barcode with the bar height at 1.0 inch,
13 mils in X dimension. On the top of the barcode, we'd like to place the
text Poly Report Cover TC-882. A completed label
will be the one like below:
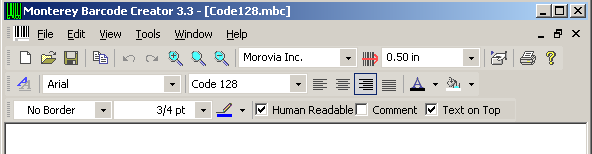
First, we are going to create a barcode. Start the
Monterey Barcode Creator by clicking | | | .
The program displays a default barcode with Morovia encoded as a
Code 39 barcode.
From the Symbology combo box in the Format toolbar, change the current symbology to UPC-A. The program displays the default UPC-A barcode.
From the Message combo box in the Standard toolbox,
type our sample number 03569012345, total 11 digits. You do not need
to enter the last checksum digit. If you do, the program
ignores it. Press or click the button  , which is on the right to the combo box.
The default barcode image does not have surrounding borders. To add the borders,
select solid line from the Border Style combo box located
on the Border toolbar, and set the border width to 3/4 pt.
The next step is to change the comment and place it on top. To do this, we need to open the Properties window. Select | or click on the button on the Standard toolbar.
Click on the Comment edit box, select all the text and press Delete.
Type Poly Report Cover\nTC-882. The characters \n forces a line return at the middle of the text. Press Enter to
apply the change.
Click on the ShowComment edit box and
select True from the drop-down menu to show comment.
Click on the CommentOnTop box and select True to place the comment on top of the barcode.
Click on the CommentFont line. A small button appears at the right of the box.
Click the button to pop up the Font dialog. Change the typeface to Arial Black,
set font style to regular and font size to 9 pt. If your computer does not have the Arial Black typeface, use Arial instead.
Click to close the dialog box.
Click on the CommentAlignment box and select mbxAlignCenter to place the comment in center.
Click on the BarHeight box and enter 1000. All length units in Barcode Creator are in mils (1/1000th inch); so 1000 translates to 1.0 inch, which is what we wanted.
You can also enter the bar height through the BarHeight combo box appearing on the
Standard toolbar. In the combo box you can use text form of the length, such as 1.0 inch.
Navigate to the NarrowBarWidth and enter 13.
As indicated above, 13 means 13 mils or 0.013 inch.
We want to leave enough spaces between the barcode and the borders.
This can be done by adjusting comment margin properties. Scroll down the Properties window and locate four symbol margin properties: CommentMarginTop, CommentMarginBottom, CommentMarginLeft and CommentMarginRight.
Assign 100 to CommentMarginTop and CommentMarginBottom.
Assign 300 to CommentMarginLeft and CommentMarginRight.
All length units used in Barcode Creator are in mils (1/1000th inch). So 300 translates into
0.3 inch.
To save the file, press Ctrl+S or select from the menu. Type the file name you would like to use and click OK.
After we finished the barcode design, now we can print them out. Our goal is simple: print a full sheet of barcode labels on Avery 8463 label paper. To do this, we first load the label paper in our printer. If you do not have such a label paper, simply load the standard letter or A4 paper.
Select from the menu, or press the Print button on the Standard toolbar. The Print dialog pops up.
Check Use Label Settings box. The dialog expands
to display the label paper properties.
In the Label Products combo box, select Avery Standard. In the Product Number box, scroll all the way down and select 8463 - Shipping.
In the Print Range box, make sure that Full Page of the Same Label option is selected.
You can have the program remember the label settings by clicking the button. Next time, the program loads the label settings automatically.
Click on the button to print a full sheet of barcode labels.
Started from version 3.3, Barcode Creator supports some advanced features such as batch printing. For more information, refer to Chapter 5, Printing Barcodes.
If you want to re-use the properties of this barcode file (such as comment text and margins), you can make the file as a template for your future new barcode files. After you make the file a template, all subsequent new barcodes copy the properties from this template file. If the template file is not present, the default barcode properties are used.
To make a file template, click on | to pop up the Options dialog.
Click the button at the right of Template File to Use box and navigate
to the barcode file we just created. Click twice to dismiss
the dialogs.
Now select from the menu. The new barcode copies all the properties from the template file.
Thumbnail view shell extension is available since version 3.6 (released in July 2010). When thumbnail view is enabled in Windows Explorer, you can view the contents of the files in thumbnail in Windows Explorer, without opening Barcode Creator.

In version 4, 64-bit thumbnail view shell extension is added to package.